Prerequisites for the Shopify app
To process Merchant Managed Fulfillment Orders, the Shopify app must have the following API scopes configured when creating it in the Shopify Developer Dashboard:
Fulfillment:
write_assigned_fulfillment_ordersread_fulfillmentswrite_fulfillmentsread_merchant_managed_fulfillment_orderswrite_merchant_managed_fulfillment_orders
Inventory und Locations:
read_inventorywrite_inventoryread_locations
Bestellungen:
read_orders
Copy the following scopes and add them to the app in the Shopify Dev Dashboard:
write_assigned_fulfillment_orders,read_fulfillments,write_fulfillments,write_inventory,read_inventory,read_locations,read_merchant_managed_fulfillment_orders,write_merchant_managed_fulfillment_orders,read_orders
If individual permissions are missing, fulfillment orders, inventory,
or locations may not be processed correctly.
Store-side prerequisites
For the Merchant Managed Location workflow to work correctly in Shopify, several prerequisites must be met. Only the interaction of Location, Inventory, Shipping Profile, and the Shopify routing rules ensures that fulfillment orders are assigned to the desired location.
Create a new location in Shopify
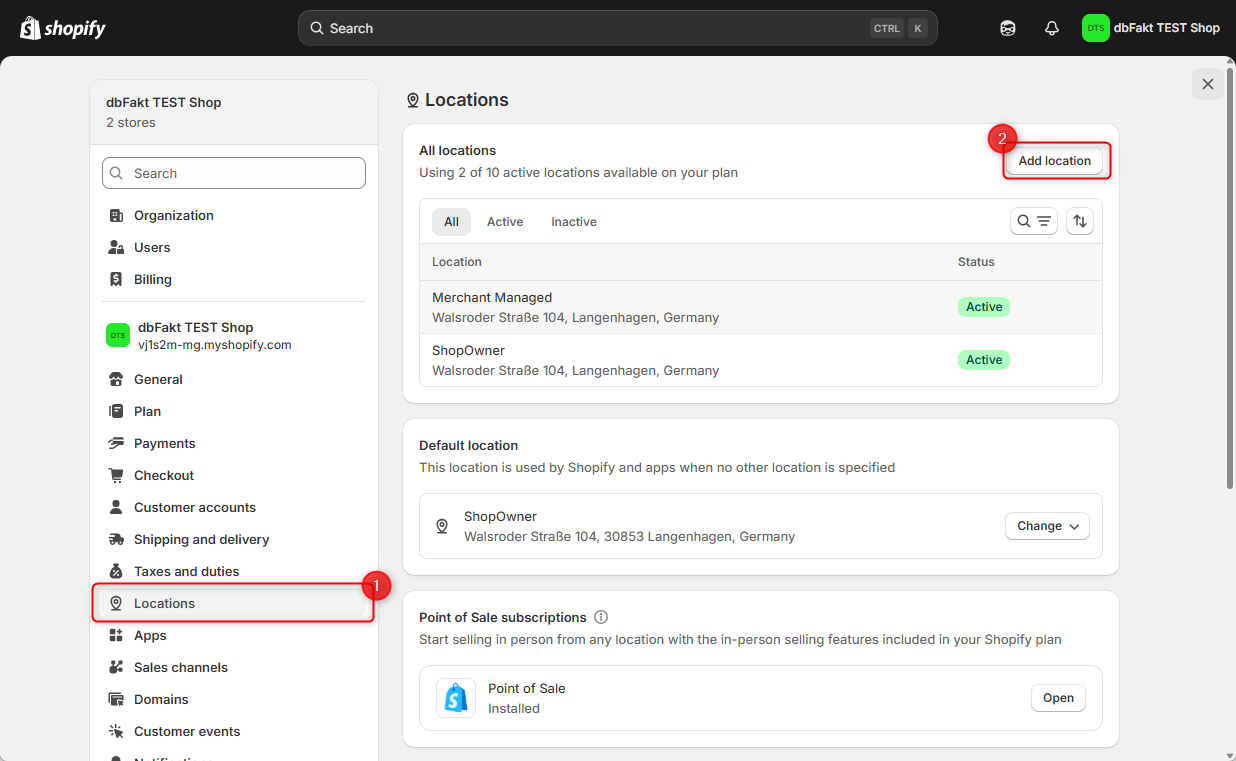
- In Shopify, open Settings → Locations.
- Click Add location.
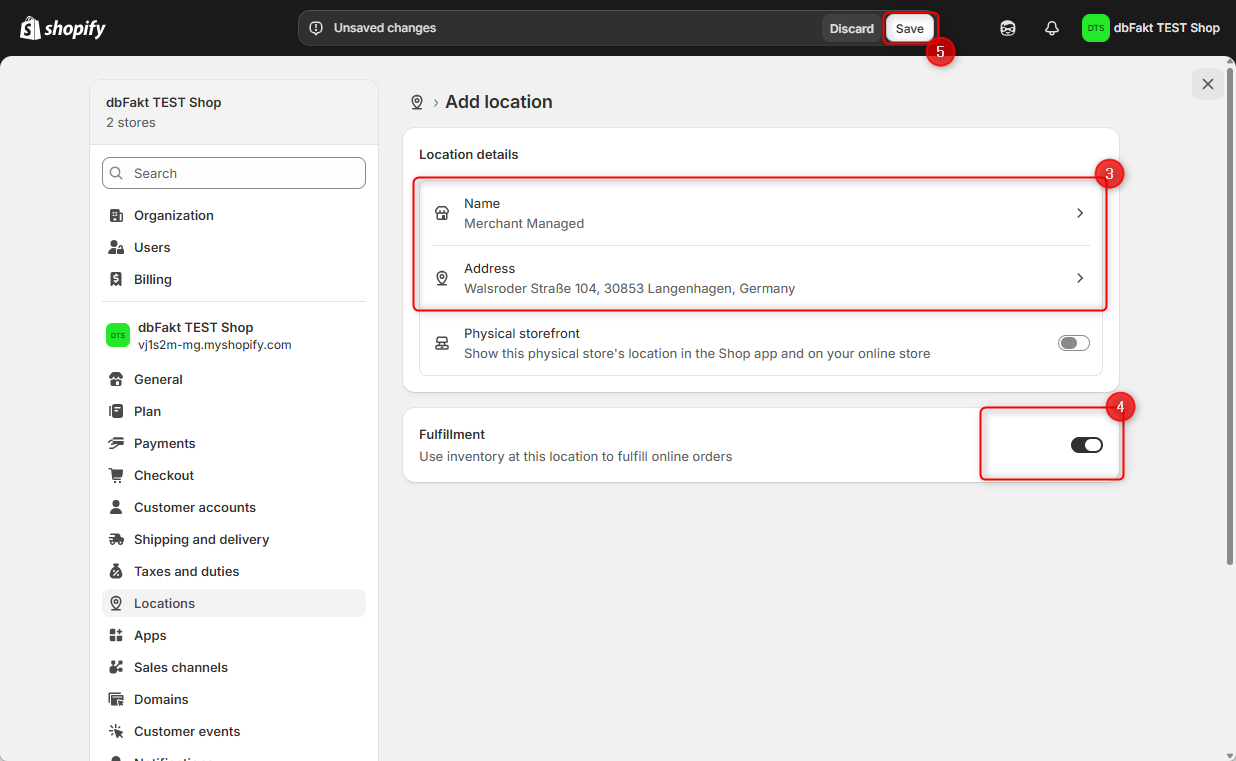
- Enter the details for the new location.
- Then enable the shipping/fulfillment function for this location.
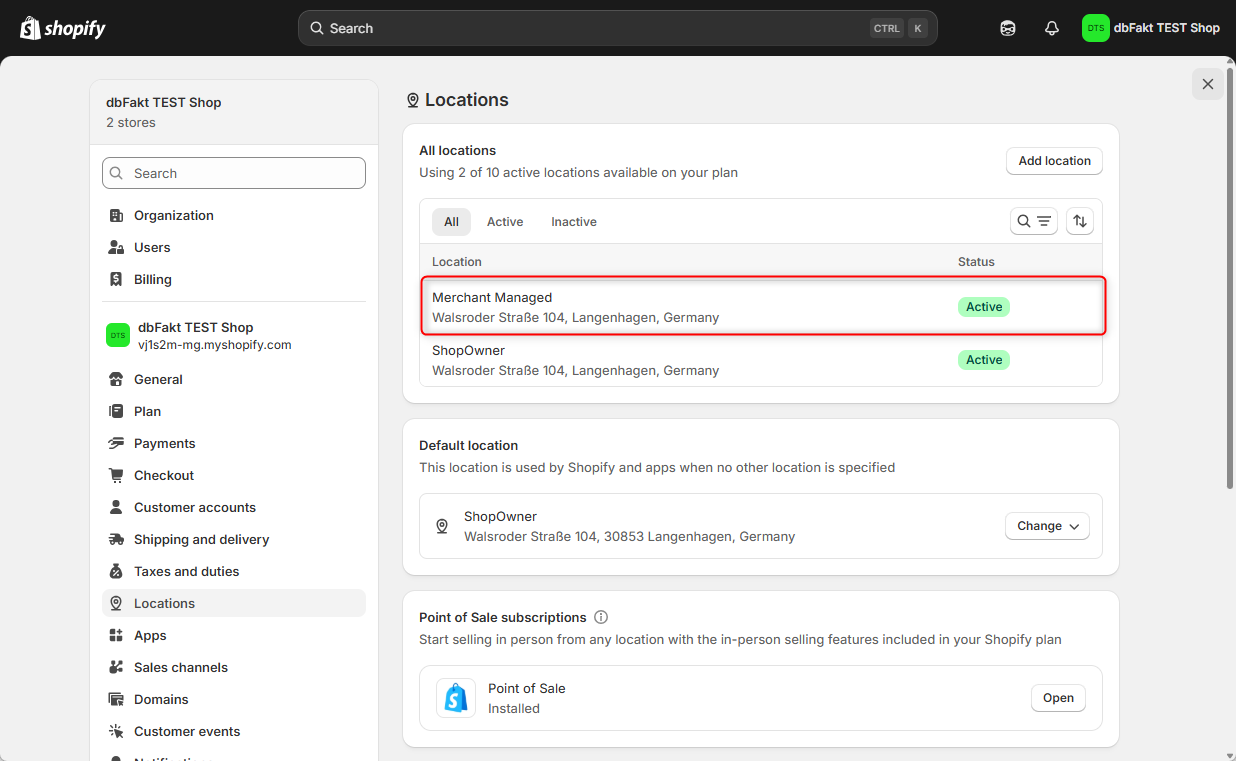
- Save the new location.
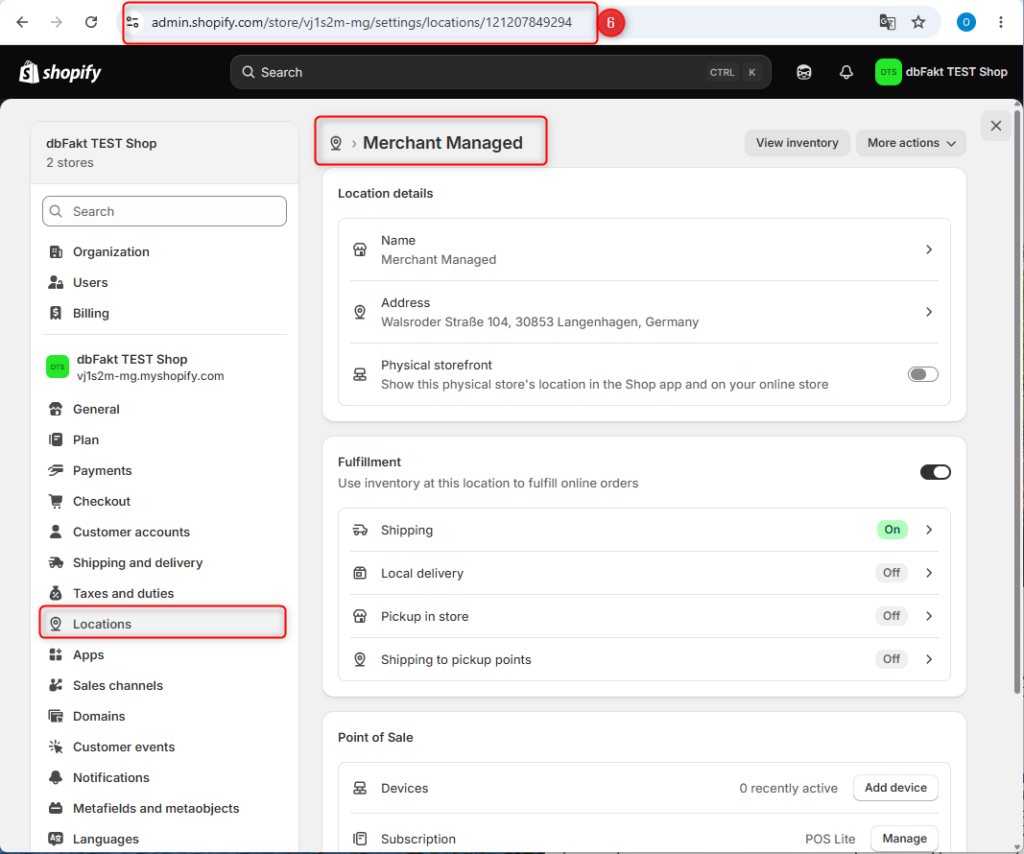
- Then open the new Merchant-Managed location, copy the URL from the address bar, and send it to dbFakt.
Example:
https://admin.shopify.com/store/vj1s2m-mg/settings/locations/121207849294
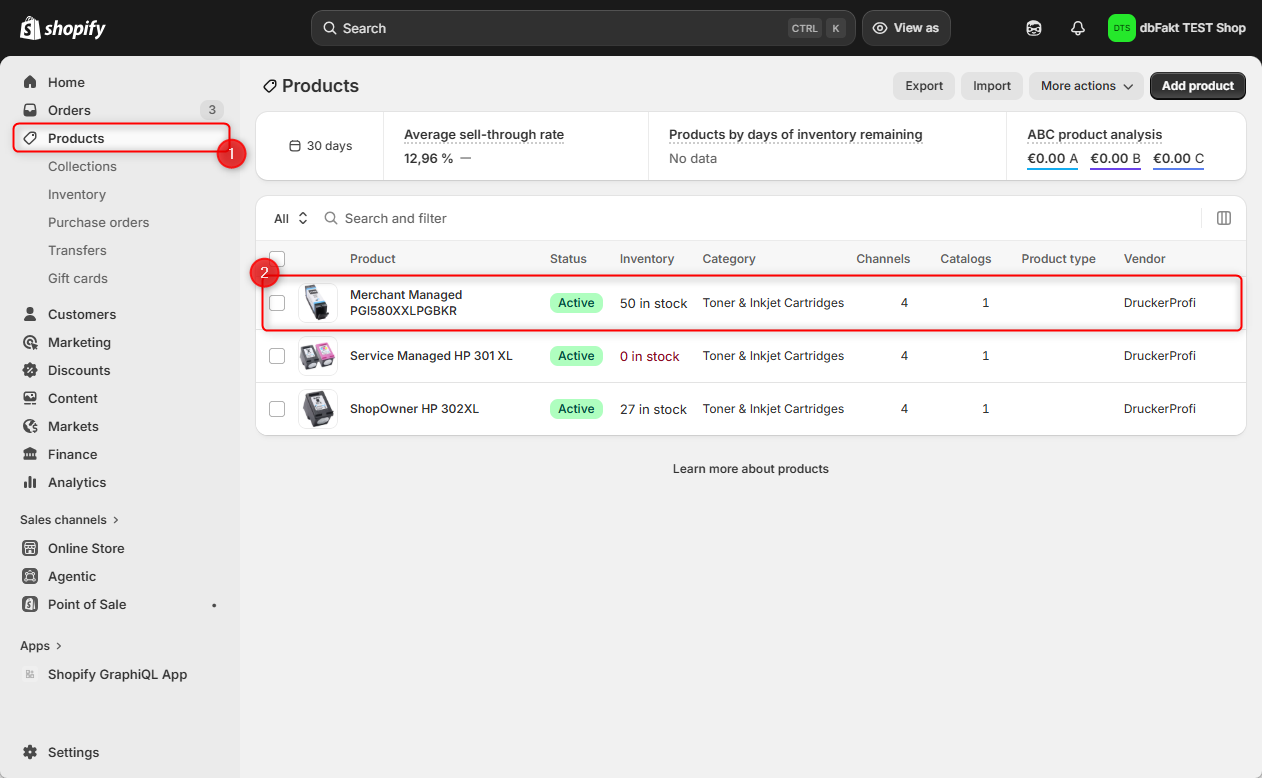
Assign products and inventory to the location
- Open Products.
- Select the desired product.
- Go to Inventory and click the pencil icon to edit.
- Enable only the locations that should be responsible for this product.
- For Merchant Managed Fulfillment, select the newly created Merchant Managed location here.
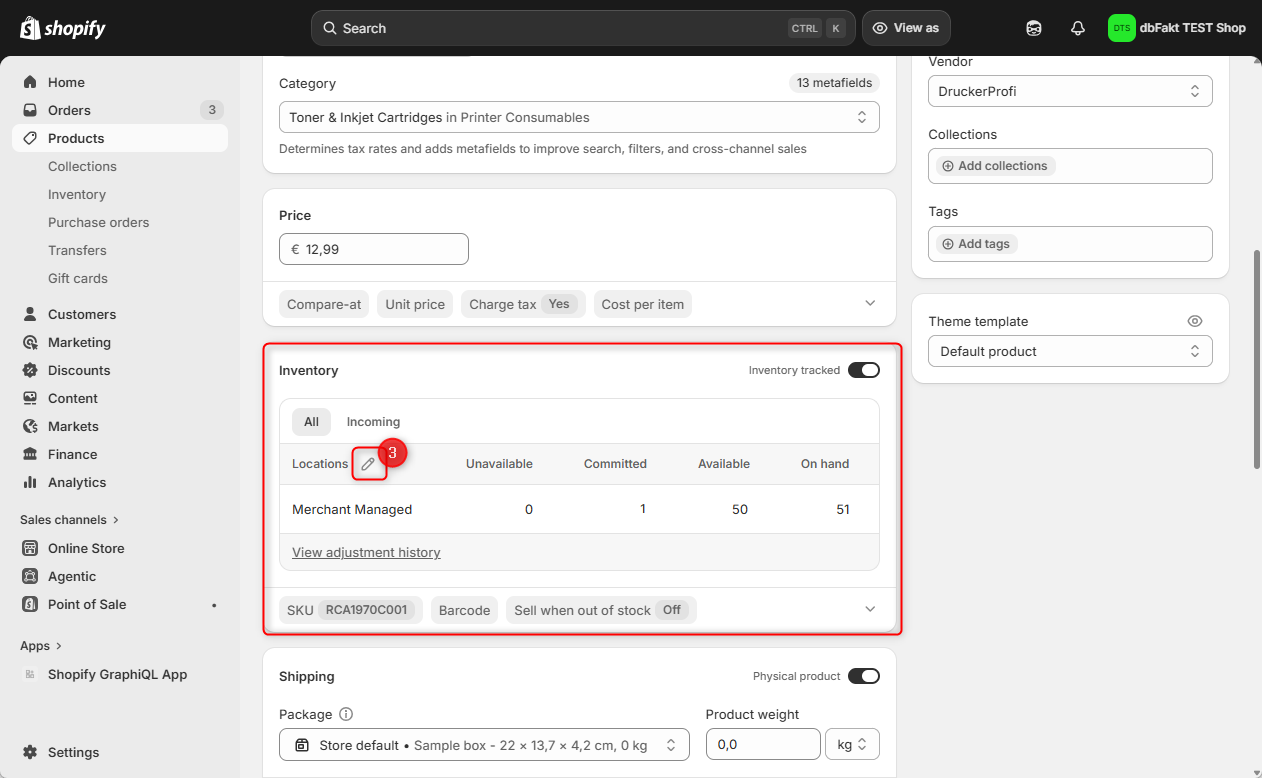

Select only the locations that are actually responsible for processing and shipping the product.
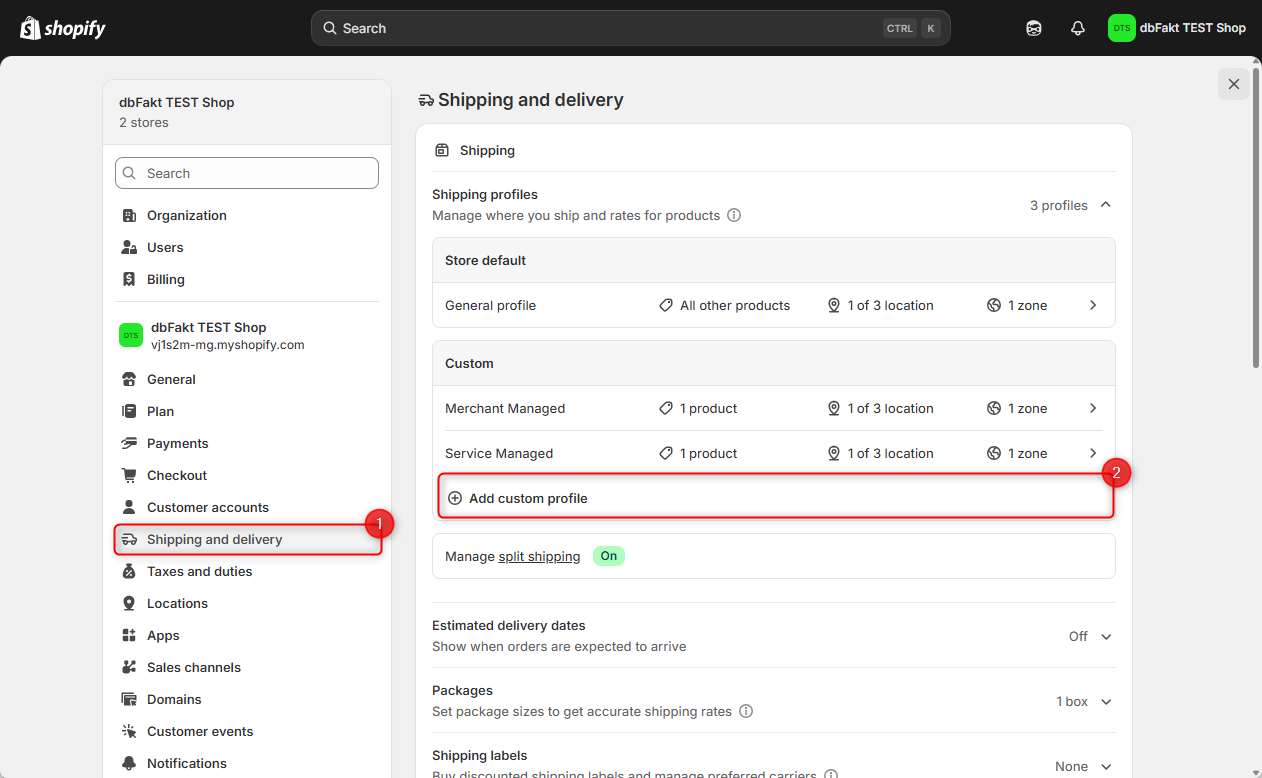
Create a shipping profile and assign the fulfillment location
- Open Settings → Shipping and delivery.
- Click Add custom profile.
- Give the shipping profile a name, for example Merchant Managed.
- Select all products that should be shipped from the Merchant Managed location.
- Under Fulfillment location, select the Merchant Managed location you created earlier.
- Set up the desired shipping zones.
- Add the corresponding shipping rates and shipping methods.
- Save the shipping profile.
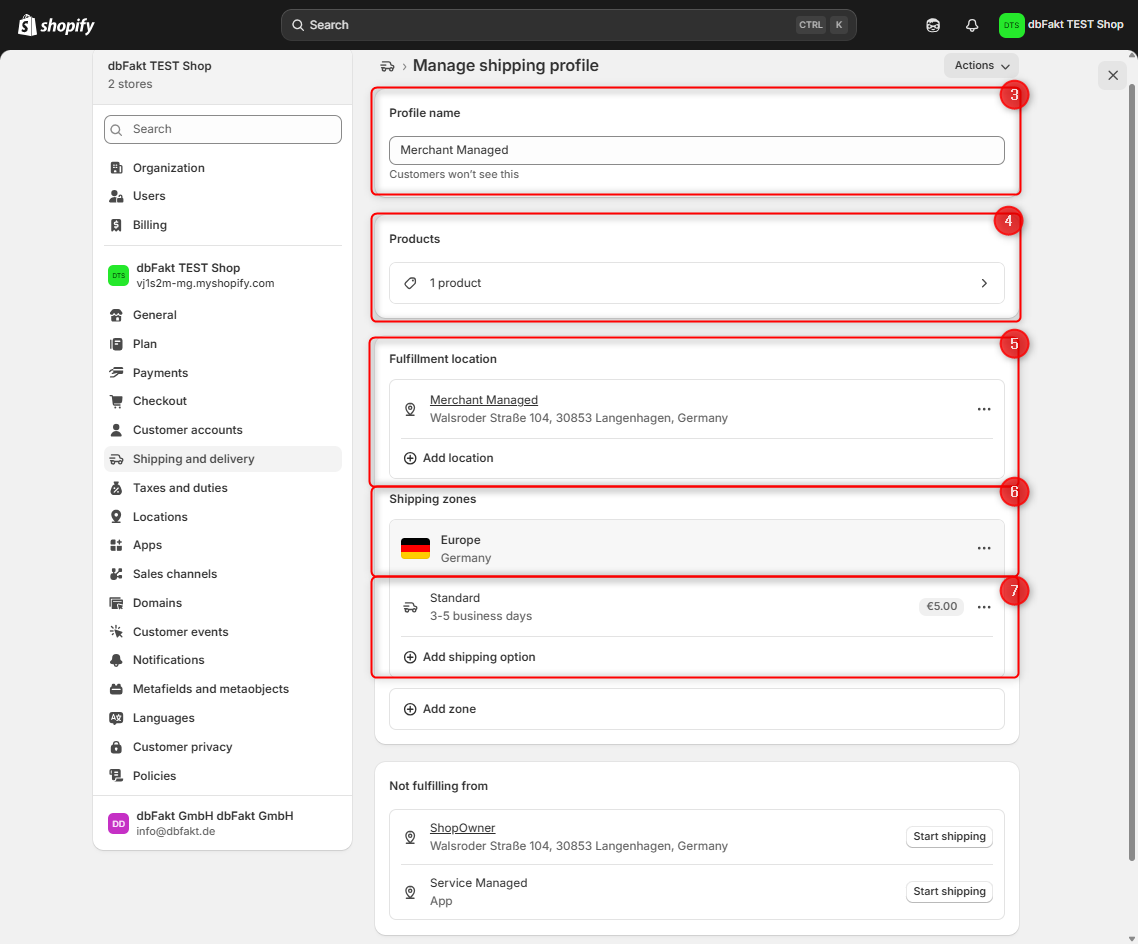
In the shipping profile, only the desired Merchant Managed location should be stored as the fulfillment location.
If additional locations are included in the shipping profile, Shopify may assign fulfillment orders to a different location.

Existing additional locations can be removed via the three-dot menu (⋯) next to the respective location.
Store setup – quick overview
- Create the Shopify app with the required scopes
- Create a new location
- Assign products and inventory
- Create a shipping profile
- Assign the Merchant Managed location to the shipping profile
- Assign products to the shipping profile
- Configure shipping zones and shipping rates
- Copy and send the URL of the Merchant-Managed location to dbFakt